Pinguicula Fountain Displays with Pumice, by Christina Toole
25 March 2019 - Guest Post
Today I’m welcoming Christina Toole to Tom’s Carnivores. If you’re a member of the ICPS Forum Facebook group, you might’ve seen some of Christina’s fantastic Pinguicula rock plantings earlier this year. I’m a huge fan of ‘Ping rocks’ and even featured them in my 2018 roundup, so I was obviously thrilled when Christina offered to write a tutorial on building fountain displays.
This is the first of several great guest articles I have in the pipeline. If you’d like to receive an email notification when the next post goes live, you can subscribe here.
Thanks for reading! If you enjoy Christina’s tutorial as much as I did, please do share it with your friends and fellow growers.
How to Make Pinguicula Fountain Displays with Pumice
In 2012, I attended a workshop by the wonderful owners of Sarracenia Northwest to learn how to create Pinguicula fountain displays. Since then I have run with the idea and made some really fun displays for myself and others. There’s been much interest in the process and after a very kind request from Tom for more information I thought I would have a shot at writing up a “How to” for those who would like to make their own Pinguicula and pumice fountain displays.
 Plants include P. gigantea, P. moranensis, P. cyclosecta, P. ‘Aphrodite’, P. ‘Titan’, P. moctezumae x gigantea, and Utricularia sandersonii.
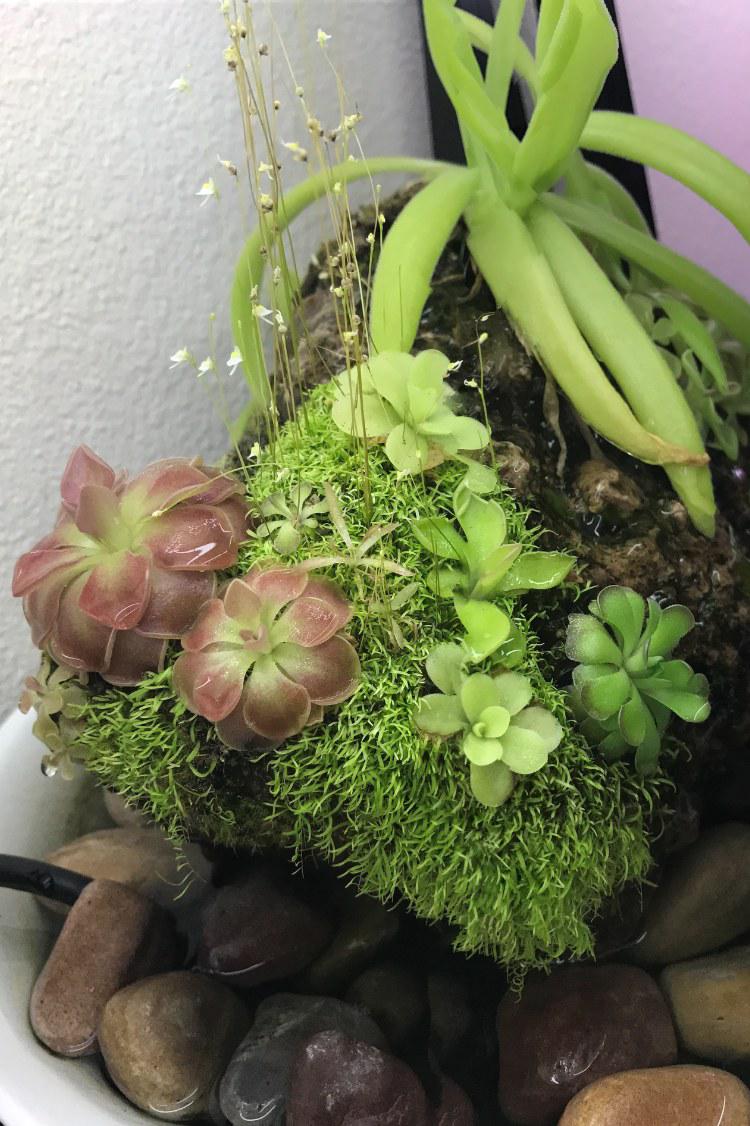
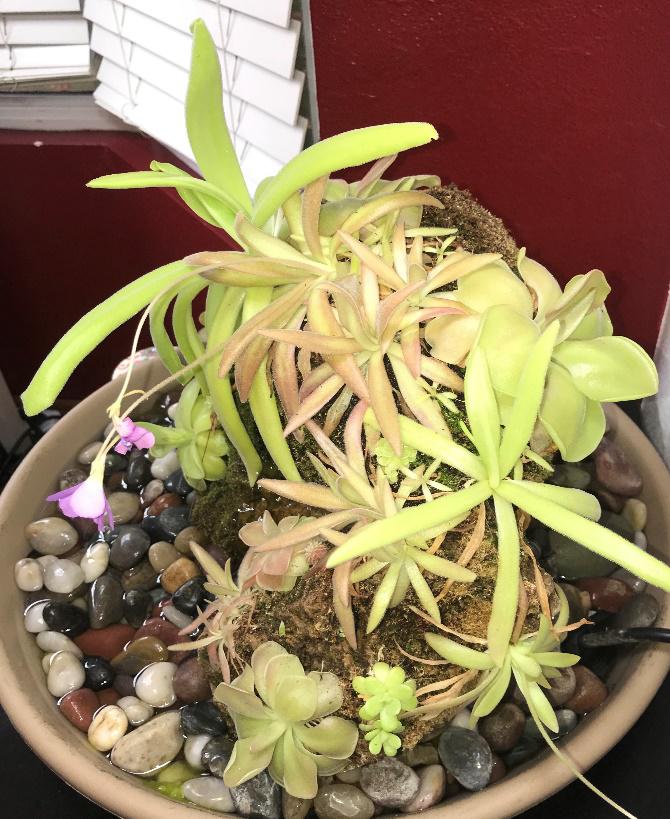
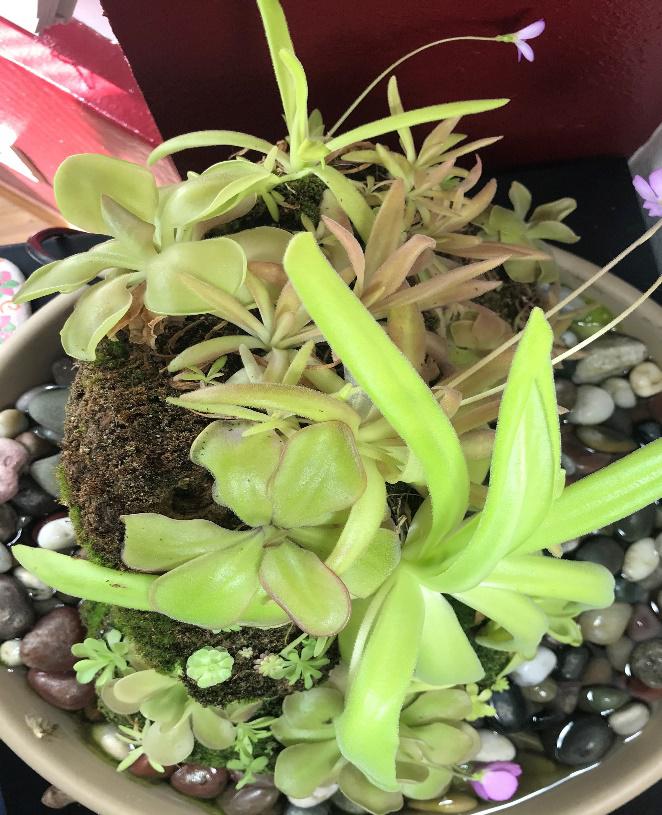
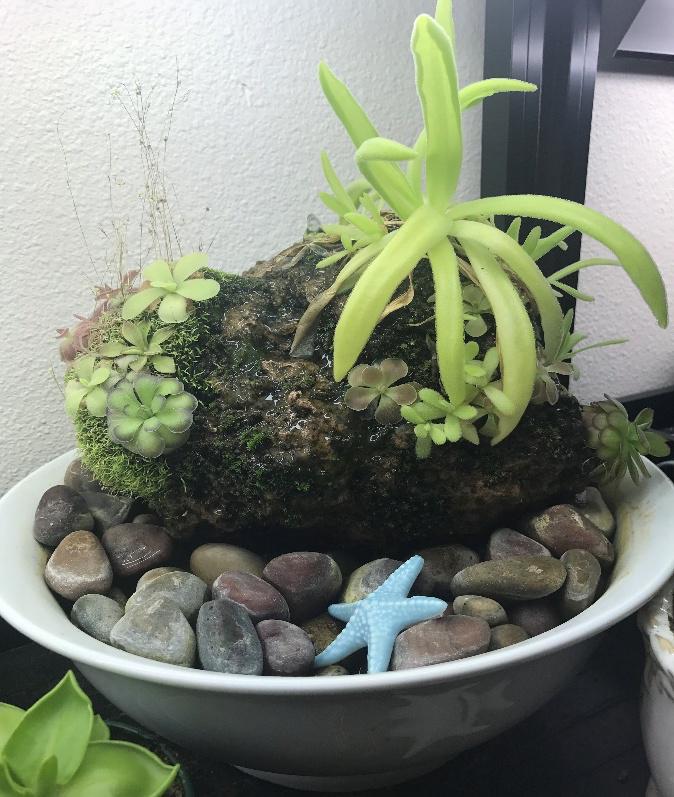
 Plants include P. ibarrae, P. 'Florian', P. moranensis, P. gigantea, P. moctezumae x gigantea, P. ‘Aphrodite’, P. ‘John Rizzi’, and more.
Materials:
- Pumice
- A spade bit or similar for drilling through the pumice
- Small water pump (I use a 80 GPH submersible pump)
- Standard aquarium tubing
- Large decorative bowl
- Rocks to cover pump and set pumice on
- Tweezers
- Pinguicula! Or leaf pullings
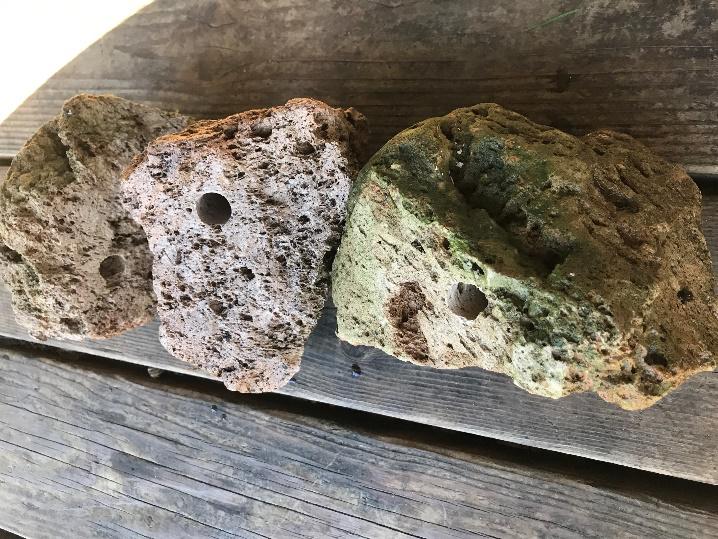
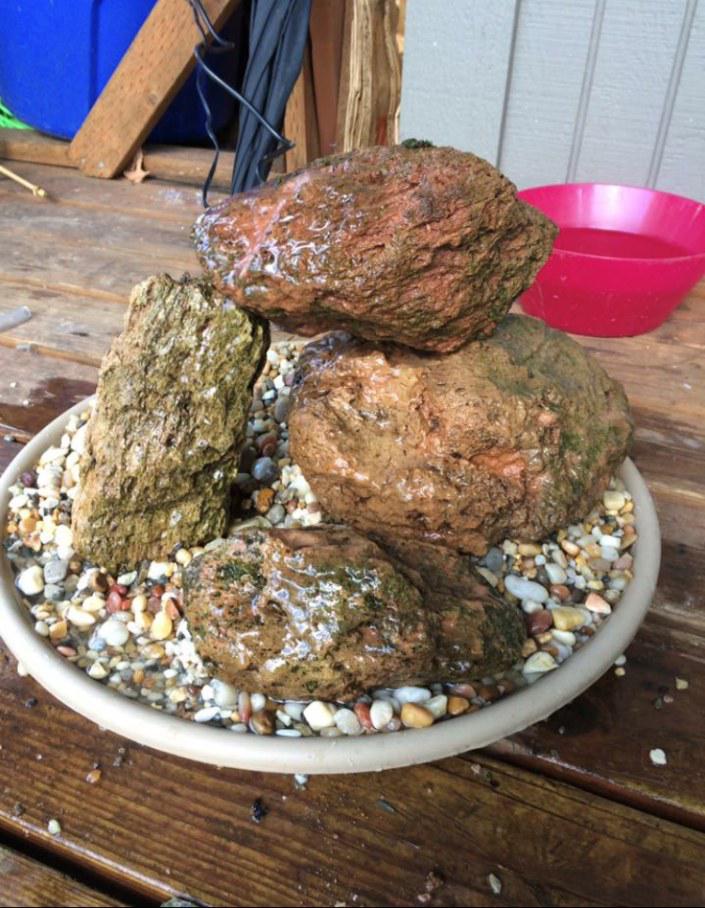
Pumice, also known as feather rock, can sometimes be difficult to find. My suggestion is to check your local landscape supply business. I choose the piece of pumice I want to use based on the shape of the display I’m going for, or the size of bowl I’m using. My thought is, the bigger the piece of pumice the better for planting more Pings!
Pumice Prep
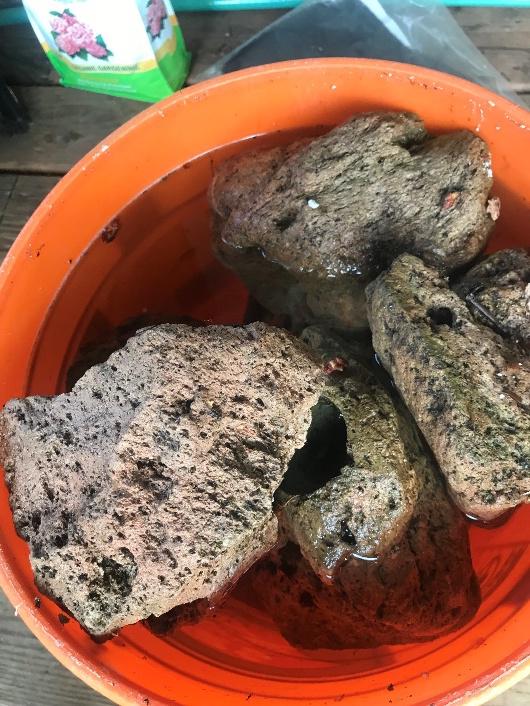
Soak your selected pumice piece for an hour or more. This will help for multiple reasons; one being you’ll want to clean the pumice as much as possible. Soaking also helps get rid of any critters that could be hiding in all those tiny holes. The pieces I use will sometimes have what’s commonly referred to as ‘star moss’ growing on them already, but I prefer to start on a clean piece to avoid missing any unwanted stowaways that may be hiding. Another reason for the soaking is that when you drill through the pumice, which is our next step, there is much less of a chance for it to split or crack.
Drilling your Pumice
Put some thought into where you want your fountain stream to come out of your piece. I usually just shoot for the highest point, but that’s not necessary. You don’t need the water to cascade down all parts of the pumice, in fact I would advise against it. Adjusting the direction of the water will come later, once we’re working with the pump. Pumice will wick water up without a pump as long as it’s partially submerged in water. Other than being visually pleasing and making the lovely sounds of trickling water, the pump does have a more important job: it keeps the water moving in order to avoid algae growth. I find this increases the time in between cleanings to years if done properly.

Once your pumice is clean and ready you can use a power drill and spade bit to make a hole in the position of your choice, all the way through the pumice piece. I use a 5/8-inch (16mm) spade bit and it seems to be a suitable size for the purpose of this project and can accommodate aquarium tubing if needed. This is a little tricky if your bit isn’t long enough to go all the way through your pumice piece, so plan accordingly (either get a bigger bit, or try drilling on both sides and meeting in the middle). Give it a good rinse, because the drilling can be messy business.
Bowl Prep
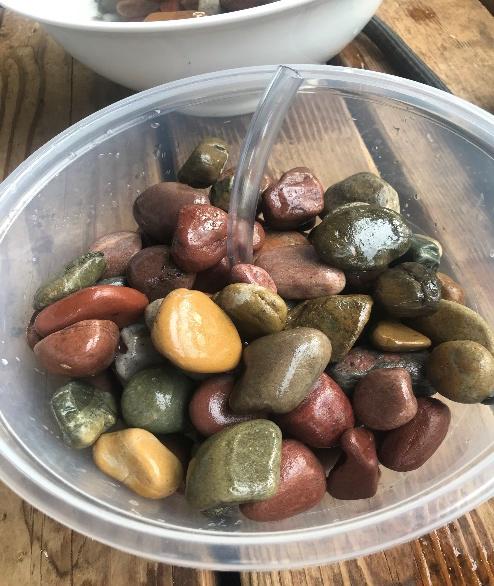
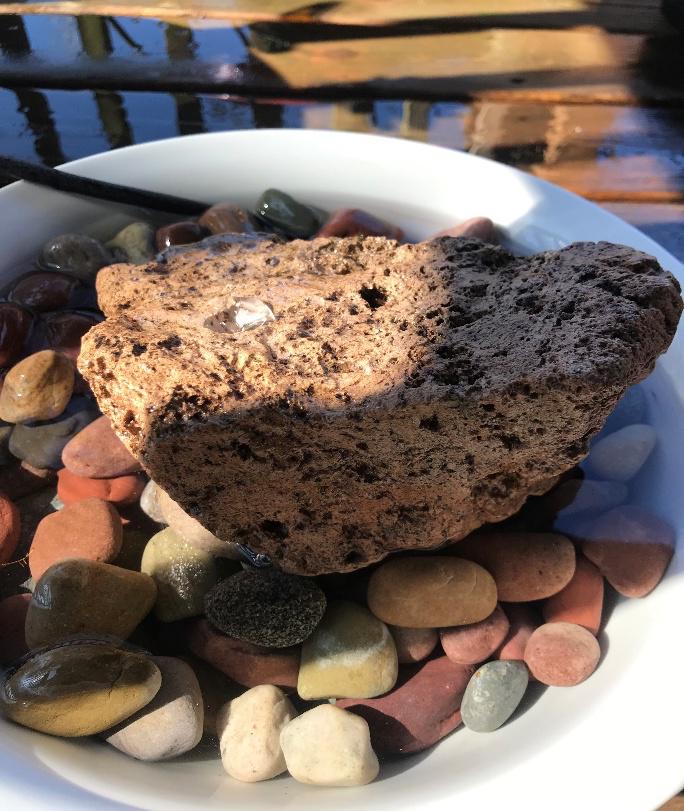
Now it’s time to get our decorative bowl set up with a pump, rocks and water. The rocks act as a base for your pumice to sit on, as well as hiding your pump. I recommend using larger rocks for this because smaller ones tend to get sucked up against the pump intake and can block water flow. Be sure to clean your rocks, too.
Attach a couple of inches of aquarium tubing to your pump; this will get the water to your fountain point. You may need to cut your tubing to size or use a longer piece, depending on the size of your pumice. Once you’ve placed your pump in the bowl, start hiding it with rocks and building a base for your pumice. It’s not a bad idea to add water and test your pump at this point. Just be sure not to let it run dry.

Next, guide the aquarium tubing through the bottom of your pumice where you drilled your hole. At the top of the pumice, I find having the tubing just out of sight below the water exit point creates the best flow for your fountain. This part can take some trial and error, but try to adjust the pump to get the water to flow exactly where you’d like it to. As I mentioned earlier, you don’t want water to flow over all the outer surface, as most Pinguicula wont do well in the constant flow of water.
Be sure not to let the water level in your bowl get too low. These types of small pumps can easily burn out if they’re allowed to run dry. I usually add water to my fountains once a week, but it will differ depending on the size of your bowl and setup. The pumice may soak up quite a bit of water during the first few days, so be sure to check the level regularly.
At this point you should have a bare fountain set up that’s ready for Pinguicula!
Adding Pinguicula
I only use Mexican Pinguicula for my fountains. I’ve yet to find one that absolutely hates the set-up, but I’m sure there are plenty out there. Here is a list of a few I have had great success with on fountains:
| Cultivars / hybrids | Species |
|---|---|
| P. ‘Aphrodite’ | P. gigantea |
| P. ‘Florian’ | P. moranensis |
| P. ‘Pirouette’ | P. cyclosecta |
| P. ‘John Rizzi’ | P. ibarrae |
| P. ‘Seductora’ | |
| P. ‘El Mirador’ | |
| P. moctezumae x gigantea |
And many, many more. I’ve also had wonderful results with leaf pulling strikes on fountains as well. It’s become one of my more trusted ways to propagate by leaf pulling. I’ve even managed to start P. gypsicola on the side of a fountain recently. Utricularia sandersonii made its way onto one of my fountains photoed above, and it also seems to enjoy this set up very much.
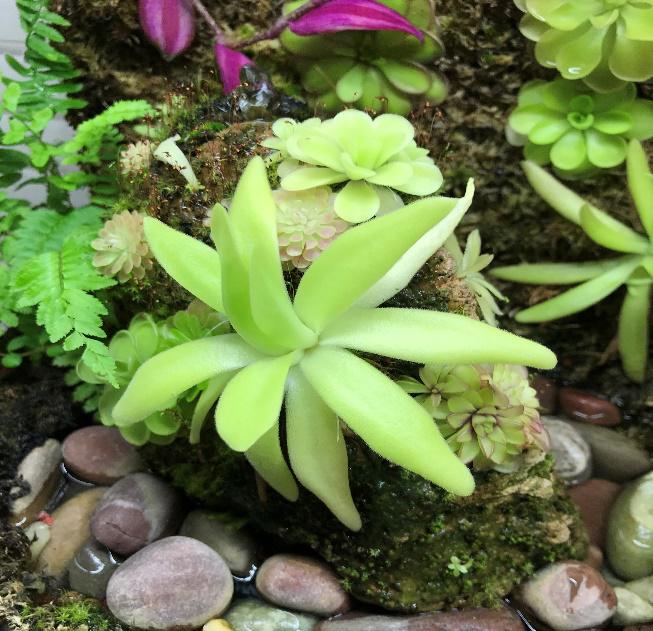
 The roots of a *P. moctezumae x gigantea* growing into pumice.
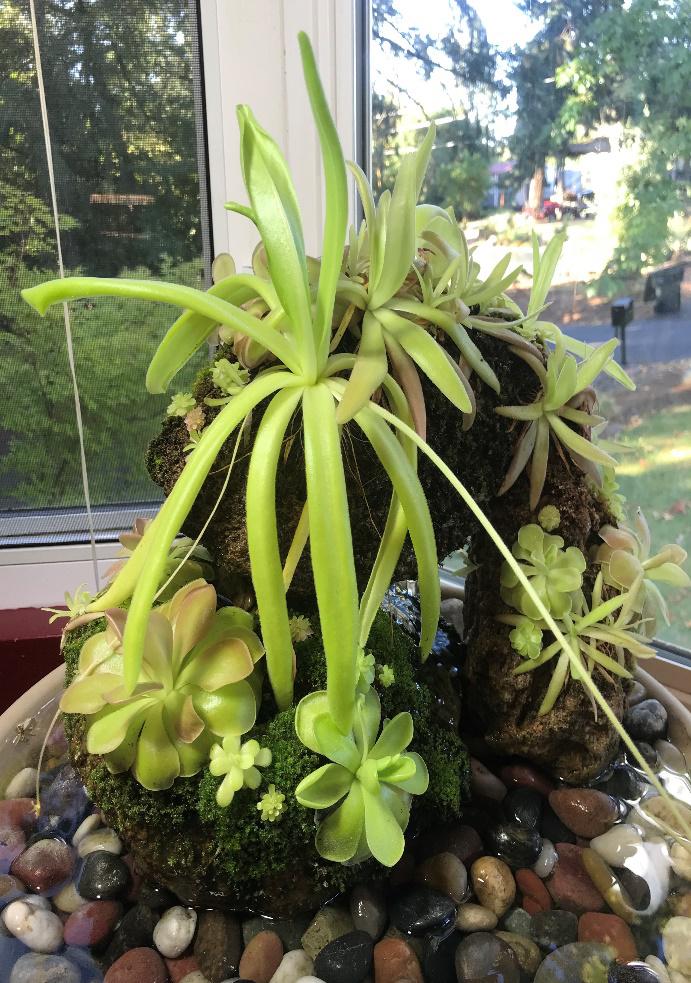
 Plants include P. ibarrae, P. 'Florian', P. moranensis, P. gigantea, P. moctezumae x gigantea, P. ‘Aphrodite’, P. ‘John Rizzi’, and more.
It’s fairly easy to attach Pinguicula to pumice. If the plants final placement is on a flat surface, you can rest it there and it will root to the pumice. If you’d like your Pinguicula placed on the side of the pumice where gravity becomes an issue, you can drill a small hole not much larger than the root system of your plant, where you’d like the plant to live. Once you have the hole ready you can pinch the base of your Pinguicula and some sphagnum moss into place. A pair of tweezers is very useful here. If you lose a few leaves in the process just set them on the pumice and new plantlets will begin to grow in no time.
I hope you have fun making your own version of a Pinguicula fountain display with pumice. Please share your creations with me at _christinanina_86 on Instagram, or email me at christina61086@yahoo.com. I look forward to seeing what you can come up with!
 Plants include P. ibarrae, P. 'Florian', P. moranensis, P. gigantea, P. moctezumae x gigantea, P. ‘Aphrodite’, P. ‘John Rizzi’, and more.
 Plants on pumice include P. moctezumae x gigantea, P. ‘Florian’, P. ‘Seductora’, P. gigantea, and a few unknown hybrids.
 Plants include P. gigantea, P. moranensis, P. cyclosecta, P. ‘Aphrodite’, P. ‘Titan’, P. moctezumae x gigantea, P. laueana, and Utricularia sandersonii.
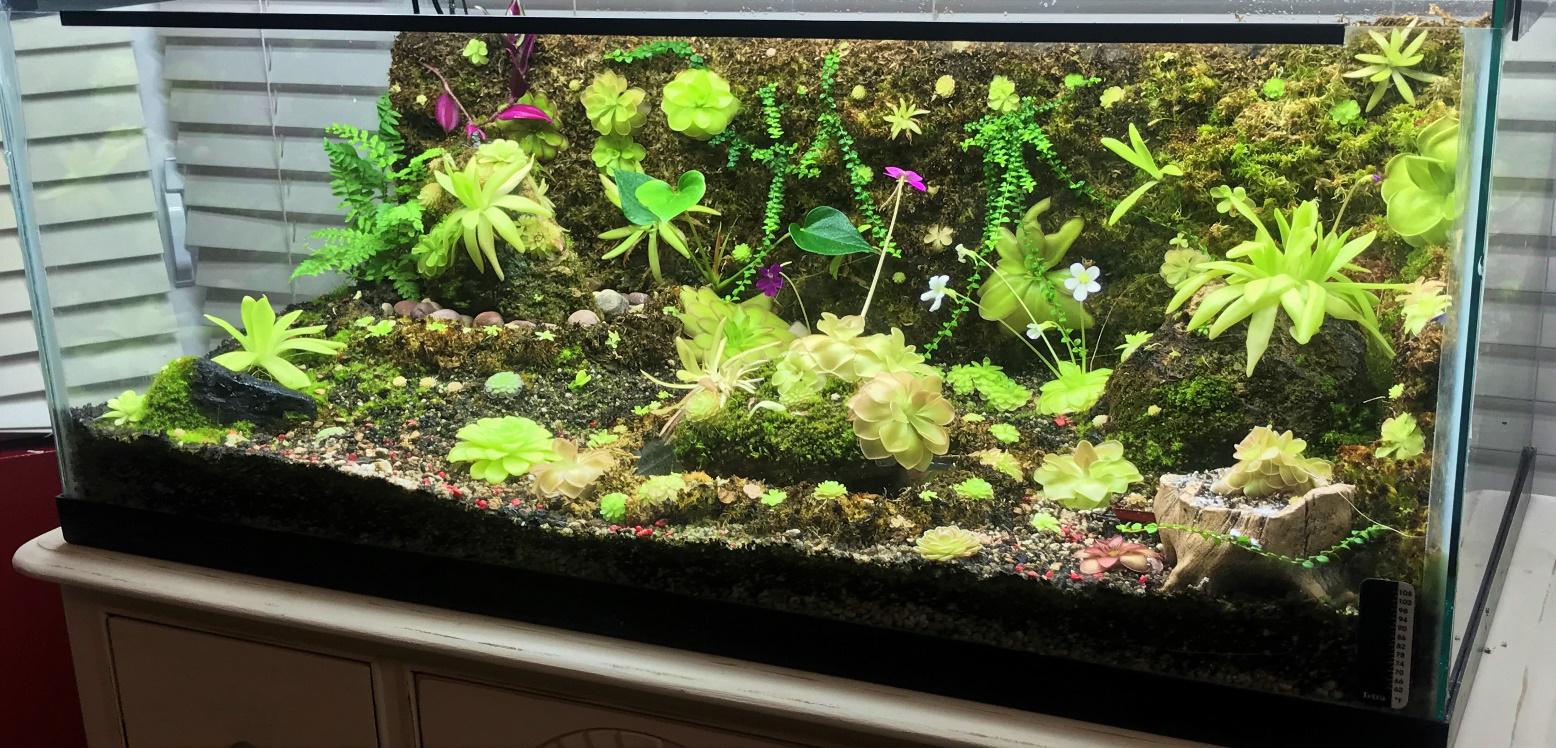 Christina's full planted Ping tank, including fountains.
Huge thanks to Christina for putting together this tutorial and sharing it on Tom’s Carnivores. Keep an eye on Christina’s Instagram for more photos of her fantastic Pinguicula rock plantings and carnivorous plant collection.
To be notified when my next article goes live, you can subscribe via email to Tom’s Carnivores.
If you run a carnivorous plant nursery or society, are involved in the conservation efforts to protect these magnificent plants, or if you’re interested in contributing a guest post to the Tom’s Carnivores blog, please send me an email.
- Next post: Q&A with David Durie of Alba Exotics
- Previous post: My 2019 visit to Christian Klein's nursery